
How to Find and Use Public Transport Maps When Traveling in Canada
Finding and using public transport maps in Canadian cities is straightforward: download the official transit app for your destination before you arrive, or grab a free paper map at any major station once you’re there. Most Canadian cities offer both digital and physical maps that show routes, stops, and transfer points, and you can usually have a working map in your hands within five minutes of landing.
I learned this the practical way during my first solo trip to Montreal. I stepped off the plane confident I’d figure out the metro on the fly, only to stand bewildered at Lionel-Groulx station staring at a spider web of colored lines while my phone searched desperately for data. A friendly commuter pointed me to the free map dispenser by the ticket booth, and suddenly the whole system clicked into place. That paper map, folded and refolded dozens of times, guided me through three days of exploration.
The beauty of Canadian transit maps is their accessibility. You don’t need a data plan, fluency in English or French, or even advance planning to navigate successfully. Whether you’re hopping SkyTrains in Vancouver, riding the C-Train in Calgary, or exploring Toronto’s extensive TTC network, the mapping systems follow similar logic and offer multiple ways to access the information you need.
This guide walks you through finding maps before you travel, locating them on arrival, and actually using them to get where you’re going without the stress of getting lost in an unfamiliar city. You’ll learn which tools work best for different travel styles and how to verify you’re heading the right direction before you board.
What You’ll Need to Access Transit Maps in Canada

Getting around Canadian cities becomes a lot easier when you’re prepared with the right tools. The good news is that you probably already own most of what you need, and what you don’t have can be picked up quickly once you arrive.
Your smartphone is your most powerful navigation tool. You’ll want a device capable of connecting to WiFi or cellular data, with enough storage space to download one or two transit apps. Most Canadian transit authorities offer dedicated apps that work across iOS and Android platforms. Before you leave home, check that your phone has at least 500MB of free space and a decent battery life, because there’s nothing worse than your navigation dying mid-journey.
- Smartphone or tablet with data capability or WiFi access
- Enough storage space for 1-2 transit apps (roughly 100-200MB each)
- Paper map as a backup option for when technology fails
- Basic sense of cardinal directions and landmark recognition
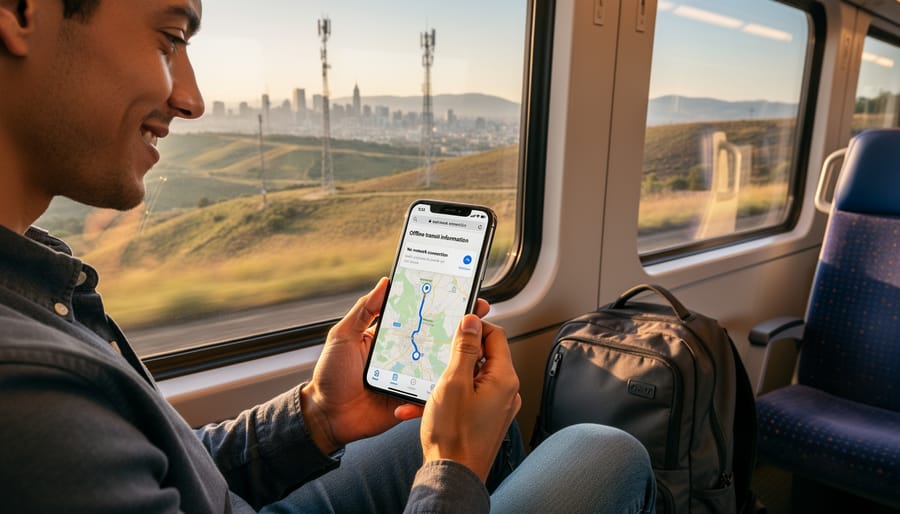
Internet connectivity matters, but you don’t need it constantly. Many transit apps let you download maps and schedules for offline use, which saved me in Montreal when my data plan decided to quit working underground. Download these before you head out each day if you’re worried about connectivity or roaming charges.
Physical maps still have their place. You can grab free paper transit maps at most major transit stations, airports, tourist information centers, and many hotels. I always pick one up as backup because phones die, apps crash, and sometimes you just want to see the whole system laid out in front of you without zooming and scrolling.
What you should prepare at home versus on arrival breaks down simply. Download the main transit app and any offline maps before your trip. Get familiar with basic map symbols like transfer points and line colors. Once you land, supplement with physical maps and ask locals about any quirks the official maps don’t show. That combination of digital convenience and analog reliability will keep you moving confidently through any Canadian city.
Before You Start: Important Considerations
Before you dive into navigating Canada’s transit systems, there are a few practical realities you need to understand. Public transport maps work brilliantly in major urban centers like Vancouver, Toronto, and Montreal, but coverage drops off sharply once you venture into smaller towns or rural areas. If your travel plans include exploring beyond city limits, don’t assume the same comprehensive transit network will exist, you might find yourself in places where taxis or rental cars are your only realistic options.
I learned this the hard way during a trip to the Okanagan Valley, where I watched my roaming bill climb while trying to load a simple bus schedule. Beyond connectivity costs, you’ll want to prepare for areas with spotty cell service, particularly if you’re heading to mountain towns or coastal regions. Download your maps and save screenshots of key routes while you’re still connected to hotel or cafe WiFi.
Another crucial consideration is map currency. Transit systems update routes seasonally, and construction projects can render a six-month-old map useless. Check the publication date on any physical map you pick up, and verify that your digital app has recent updates. Sometimes the smartest move isn’t trusting the map at all, if you’re genuinely confused or the information seems contradictory, ask a transit employee or local commuter. They’ll often know about temporary route changes or service disruptions that haven’t made it onto official maps yet.
Step-by-Step: Finding Your Public Transport Map
Step 1: Identify Which City or Region You’re Visiting and Its Transit Authority
Before you land, figure out which transit system you’ll actually be using. Montreal has the STM, Toronto operates the TTC, Vancouver runs TransLink, and Calgary uses Calgary Transit. Each has its own network, rules, and quirks. I once assumed all Canadian cities used the same app, they don’t. Knowing the exact name of your transit authority saves you from downloading the wrong app or grabbing maps for a different city entirely.
Search “[city name] public transit” on your phone before departure. The official transit authority website should appear first. Bookmark it. If you’re visiting multiple cities on one trip, create a folder with each authority’s site so you’re not scrambling at 6 a.m. in an unfamiliar train station.
Step 2: Locate Official Transit Authority Websites or Visitor Centers
Official websites are your most reliable source for current maps. Visit the transit authority’s homepage and look for sections labeled “Maps,” “Plan Your Trip,” or “Rider Info.” Most Canadian transit systems post downloadable PDF maps that show the entire network at a glance.
Visitor centers offer another solid option. Airport information desks stock transit maps, check these spots when you grab Vancouver airport tips or review Toronto Pearson tips for getting through security. Downtown tourist offices and major hotels usually keep stacks of free maps at their front desks. Transit station customer service windows can provide maps if you ask, though availability varies by location.
Step 3: Download the Appropriate Transit App or Save Digital Maps
- Search your phone’s app store for the official transit app (Transit, Google Maps, or the authority’s proprietary app like STM’s app for Montreal).
- Download the app while connected to WiFi to avoid data charges.
- Open the app and allow location permissions so it can show nearby stops and real-time arrivals.
- Download offline maps if the app offers this feature, crucial for areas with spotty cell service or if you’re avoiding roaming fees.
- Take screenshots of key routes you’ll use frequently and save them to your photos for instant access without opening the app.
Google Maps works across all Canadian cities and includes transit directions, but dedicated local apps often provide more detailed information about delays, service changes, and accessibility features.
Step 4: Pick Up Physical Maps at Stations, Airports, or Hotels
Even if you’re digitally equipped, grab a paper backup. Station entrance kiosks, ticket vending machines, and customer service counters typically have free pocket maps. Airport arrival areas stock them near baggage claim or ground transportation signs.
Physical maps don’t need battery power or cell signal. They’re also easier to share when asking locals for directions. I keep one folded in my jacket pocket as insurance against dead phones.
Step 5: Familiarize Yourself with the Legend and Zone System
Open your map and study the legend before you need it urgently. Transit lines appear in different colors, subway, light rail, and bus routes each have distinct markers. Transfer stations show where lines intersect, marked with interchange symbols or multiple colored dots.
Zone systems determine fare pricing in cities like Vancouver. Understanding which zone your destination sits in prevents fare confusion or accidental underpayment. Look for zone boundary lines on the map, usually indicated with dashed lines or shaded regions. Check if your pass covers all zones or just downtown areas.
How to Read and Navigate Your Transit Map
Canadian transit maps follow a visual language that, once decoded, makes navigating unfamiliar cities surprisingly straightforward. Each colored line represents a different route or service, and these colors stay consistent across digital apps, station posters, and printed maps. You’ll find that Toronto’s Line 1 appears in yellow everywhere you look, while Vancouver’s Expo Line shows up in teal. This consistency helps you track your journey whether you’re checking your phone or glancing at a station wall map.
Transfer points appear as intersecting circles or squares where multiple lines meet. These stations let you switch between routes without leaving the system or paying again. Look for the transfer symbol (usually a small icon showing crossing arrows) to identify where you can change direction or switch to a different line entirely.
I learned about zone boundaries the hard way during my first trip to Vancouver. I assumed my ticket would take me from downtown to the airport, but I’d only purchased a one-zone fare when I actually needed three zones. The map showed faint dotted lines dividing the system into fare zones, but I’d focused only on the route colors and missed them completely. Now I always check zone maps first, before I plan my route. The zones determine your fare, so understanding them saves both money and the awkwardness of explaining to a transit officer why your ticket doesn’t match your destination.
Service frequencies often appear as small indicators along each line. Some maps show peak versus off-peak schedules, while others display numbers representing how often trains or buses arrive. A “5-10” notation means you’ll wait somewhere between five and ten minutes, similar to how real-time airport status boards show departure intervals.
Accessibility symbols matter if you’re traveling with luggage, strollers, or mobility devices. Look for wheelchair icons marking elevator-equipped stations, since not every stop offers barrier-free access.
Route numbering follows patterns. Lower numbers (1-99) typically indicate primary routes, while higher numbers (100+) often serve neighborhood or express services. Directional indicators show compass points or terminal station names, so a sign reading “Eastbound to Kennedy” tells you both the direction and final destination.
Checking Your Route and Confirming You’re on Track

Once you’re on the move, verification becomes your safety net. Pull out your transit map and cross-reference it with the real-time arrival boards at stations or in-app tracking. I learned this the hard way in Montreal when I hopped on what I thought was the Green Line, only to realize three stops later I’d boarded a bus heading in the opposite direction. Now I always check the final destination displayed on the vehicle against my map before stepping aboard.
Landmarks become your visual anchors when you’re uncertain. If your map shows you’ll pass a major intersection or recognizable building, watch for it through the window. Miss your expected landmark? Don’t panic. Check the next station name announcement against your map, or simply ask a fellow passenger. Canadians are generally helpful, and a quick “Excuse me, does this train stop at [your destination]?” works wonders. These travel alone tips matter even more when you’re navigating solo in an unfamiliar city.
If you realize you’re going the wrong way, exit at the next stop rather than riding it out. Most Canadian transit systems charge by zone or time rather than by transfer, so switching directions usually won’t cost extra. Check your map for the nearest crossover point to get back on track.
You’ll know you’ve arrived when the station name matches your map destination and surrounding street signs confirm the neighborhood. Before your next trip, make notes on your map about which exits worked best or any confusing transfer points you encountered. That marked-up map becomes your personalized navigation tool.
Common Questions About Canadian Transit Maps
Navigating a new city’s transit system raises plenty of practical questions, and I’ve found that getting clear answers before you arrive saves considerable time and frustration. Here are the questions travelers ask most often about Canadian transit maps.
Are transit maps available in multiple languages?
Most major Canadian cities offer maps in English and French, reflecting the country’s bilingual status. Vancouver, Toronto, and Montreal typically provide additional languages like Mandarin, Spanish, or Punjabi at major hubs, though smaller cities may stick to just English and French.
Can I use the same map for buses and trains?
Transit authorities usually publish integrated maps showing all services together, but you might find separate maps for rapid transit versus local buses. The integrated versions work best for planning trips that involve transfers between different modes.
Do I need different maps for each city?
Yes, each Canadian city operates its own transit system with unique routes, zones, and numbering. What you learn in Vancouver won’t necessarily translate to Calgary’s system, so download fresh maps for every destination.
How often are maps updated?
Digital maps update continuously as routes change, while printed versions typically refresh quarterly or when major service changes occur. Always check the publication date on physical maps and favor digital versions for current information.
When you can’t find your specific destination on a transit map, it usually means you’ll need to combine transit with walking or use a local bus route not shown on the simplified system map. Transit apps with full route listings help fill these gaps better than overview maps. As for cross-city apps, Google Maps and Transit App both work across Canadian cities, though downloading each city’s official app gives you the most detailed local information and real-time updates specific to that system.